Clôture quotidienne des commandes à 14h

Tirez le meilleur parti de vos plateaux Dewalt Toughsystem 2.0
Les plateaux DeWalt Tough System 2.0 étaient une nouvelle addition à la gamme et nous les aimons déjà. Ils transforment ce qui pourrait autrement être beaucoup d'espace perdu dans le haut des boîtes profondes en un espace vraiment utile. Mais dans ce projet, nous passons au niveau supérieur et vous montrons comment, avec l'ajout d'inserts sur mesure en Shadow Foam, vous pouvez vraiment tirer le meilleur parti de cet espace et de vos plateaux DeWalt.plateaux System 2.0
Comment fonctionnent les plateaux DeWalt Tough System 2.0
Vous avez peut-être déjà vu les plateaux Tough System 2.0 en utilisation, car nous avons fabriqué des inserts pour eux dans notre récent DeWalt Tough System 2.0. projet de transformation.
Les plateaux en plastique que DeWalt a récemment introduits dans la série Tough System 2.0 sont fabriqués en polycarbonate résistant. Ils disposent de poignées latérales à double fonction. Celles-ci permettent un retrait facile des plateaux de boîte lorsqu'elles sont utilisées comme poignée. Mais elles agissent également comme un verrou pour connecter les plateaux entre eux.
Nous avons en stock inserts sur mesure pour ces plateaux dans toutes les couleurs, et ils sont disponibles avec des inserts de 50 mm et de 30 mm, selon ce que vous y stockez. Plateaux DeWalt Tough System 2.0
Si vous allez optimiser l'espace que vous obtenez en Mousse de protection vos propres plateaux DeWalt, tout ce dont vous avez besoin pour commencer est votre choix d'insertion et un kit de découpe. Comme toujours, nous vous recommetons de vous familiariser avec les meilleures façons de travailler avec la mousse grâce à notre court mais efficace Comment couper and Comment Éplucher tutoriels d'abord.

Premier projet – Plateau peu profond pour clés
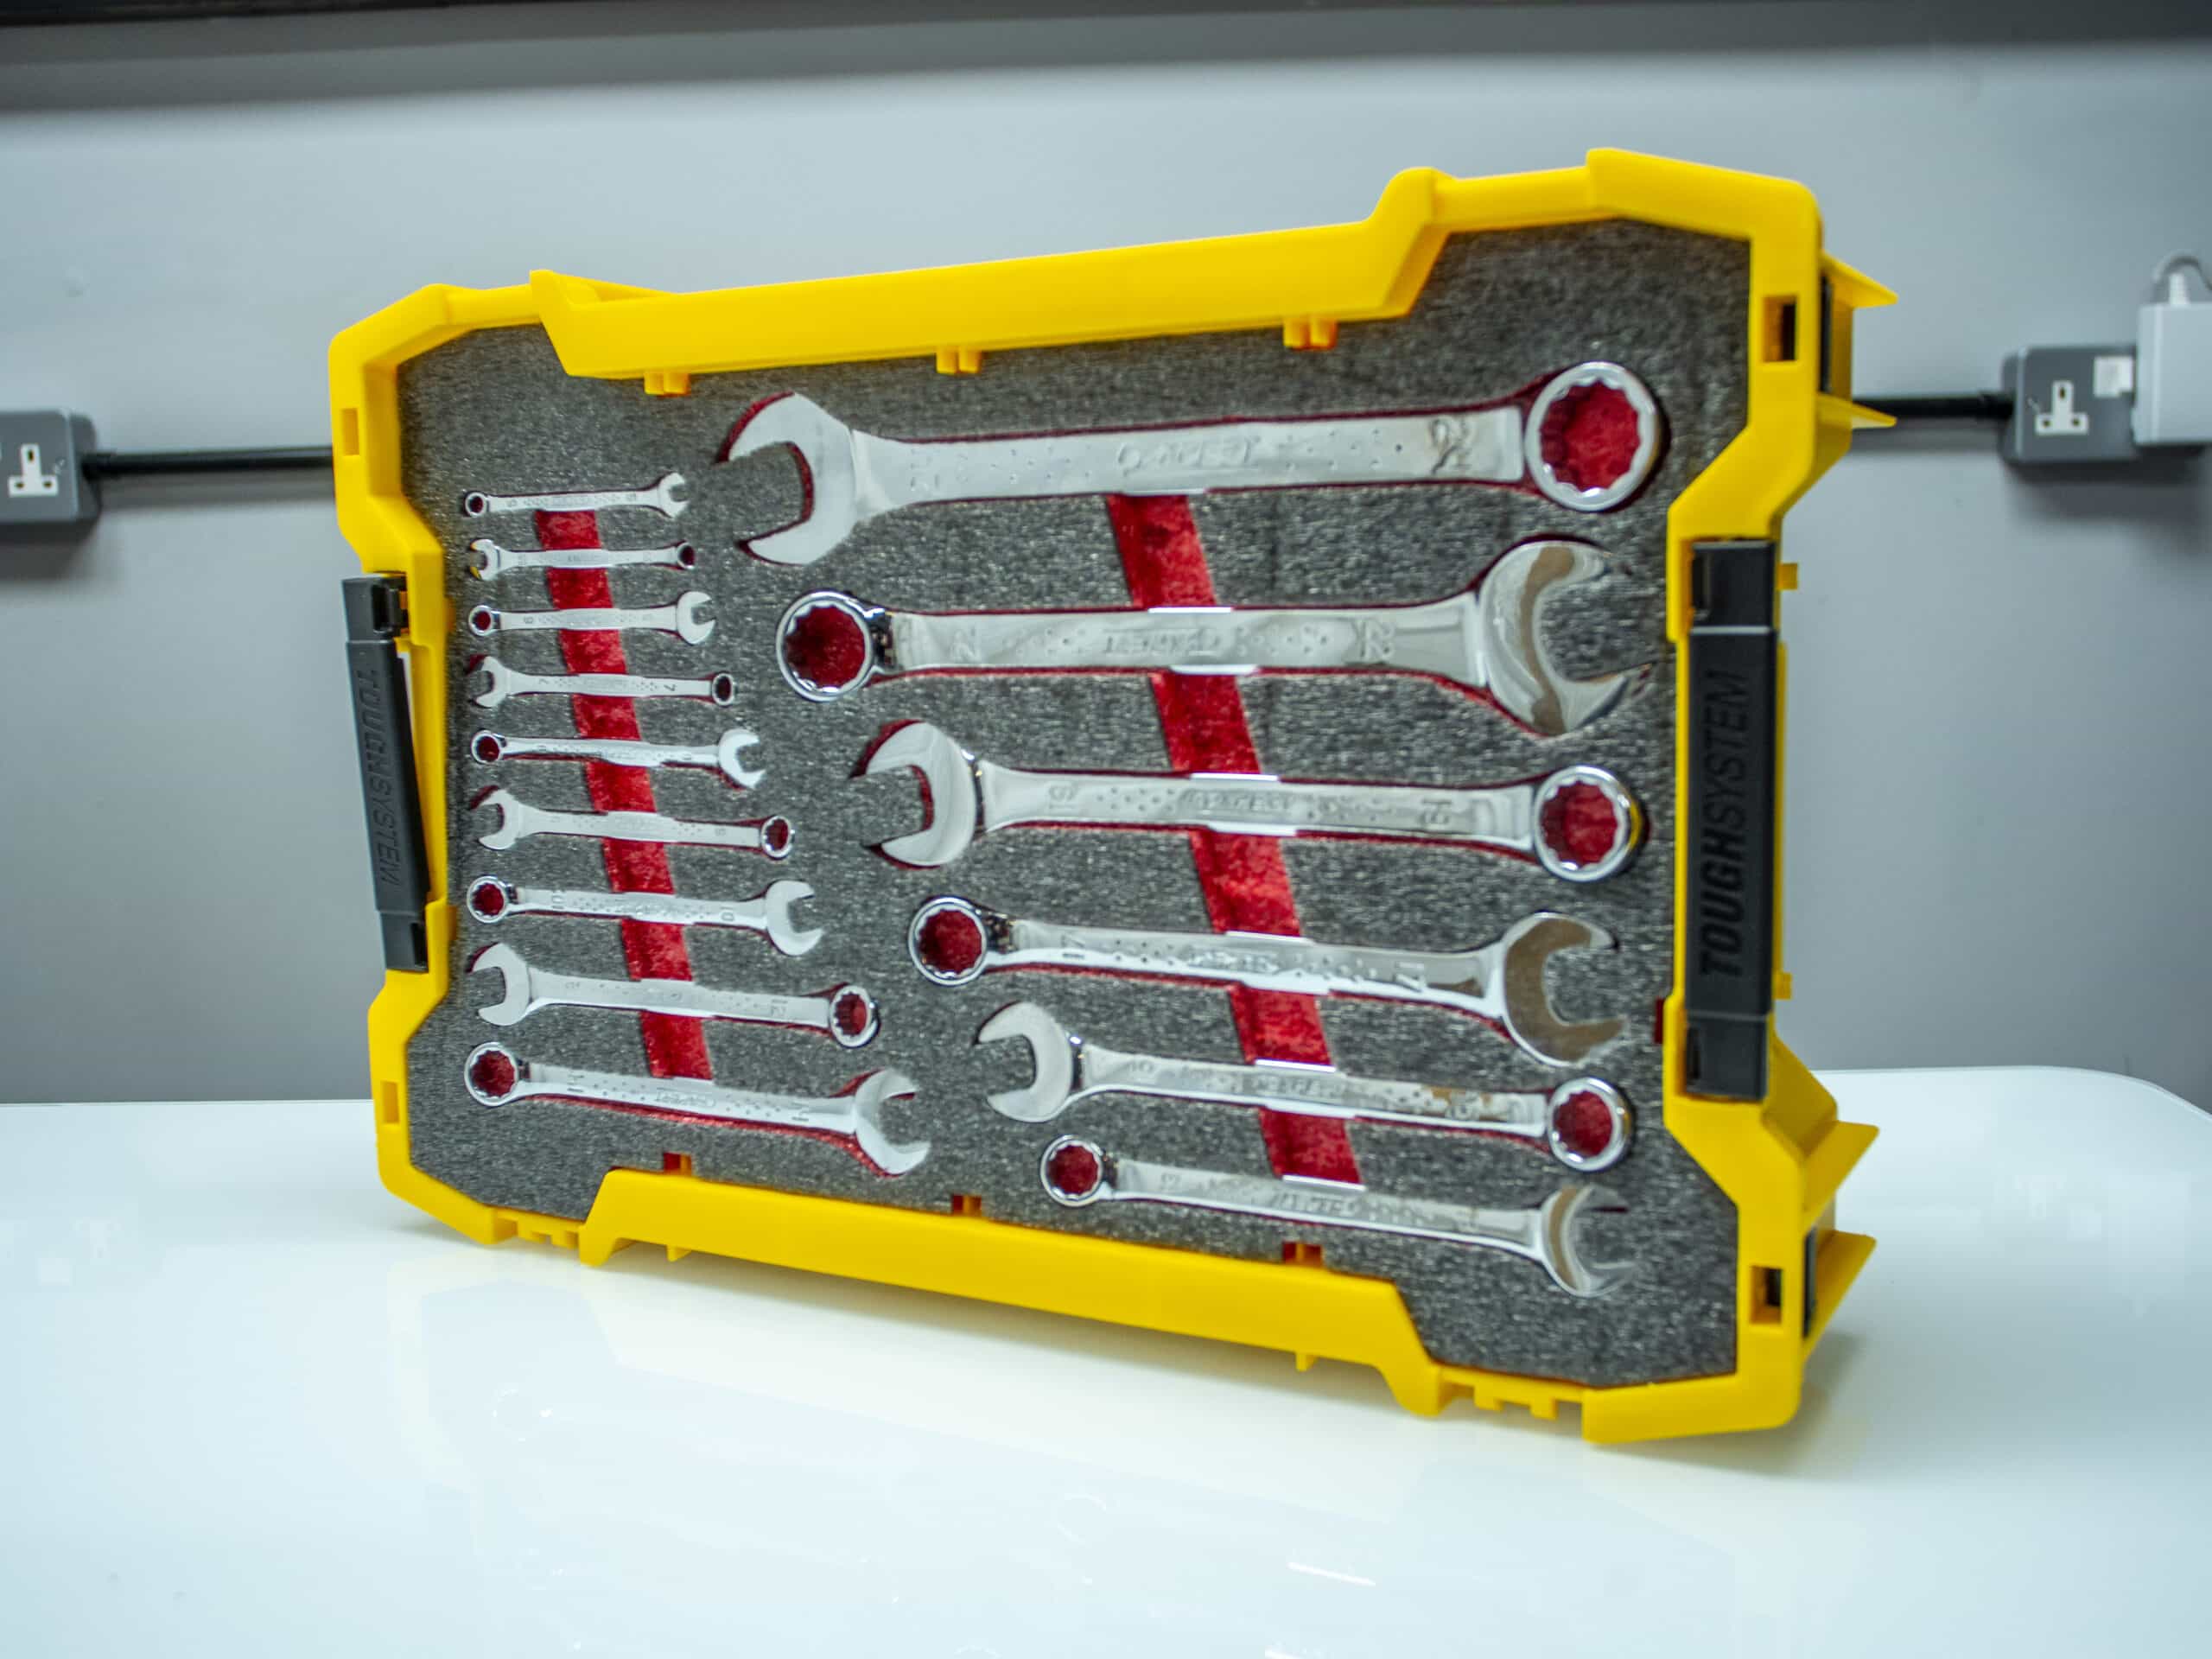
Le premier plateau peu profond que nous voulions organiser allait être pour notre Britool Expert jeu de clés à molette. Nous les avons dans toutes les tailles, de 24 mm à 5 mm. S'il y avait plus de clés que nous en avons, nous aurions pu les couper dans la mousse sur leurs côtés pour maximiser l'espace et en mettre plus. Mais pour l'instant, nous avons suffisamment de place pour les stocker à plat si nous sommes malins à ce sujet. Donc, en plaçant les extrémités OGV et les extrémités ouvertes, cela nous fait juste assez d'espace pour les ranger tous proprement dans l'insertion. Plateaux DeWalt Tough System 2.0
Pour ceux-ci, nous avons utilisé un insert Red de 30 mm de profondeur et ajouté des poignées pour faciliter la sortie des clés. De plus, cela donne un aspect vraiment cool avec la combinaison de chrome et la touche de Colour du Red et du Yellow ensemble.

Prochain projet – plateau profond pour ciseaux
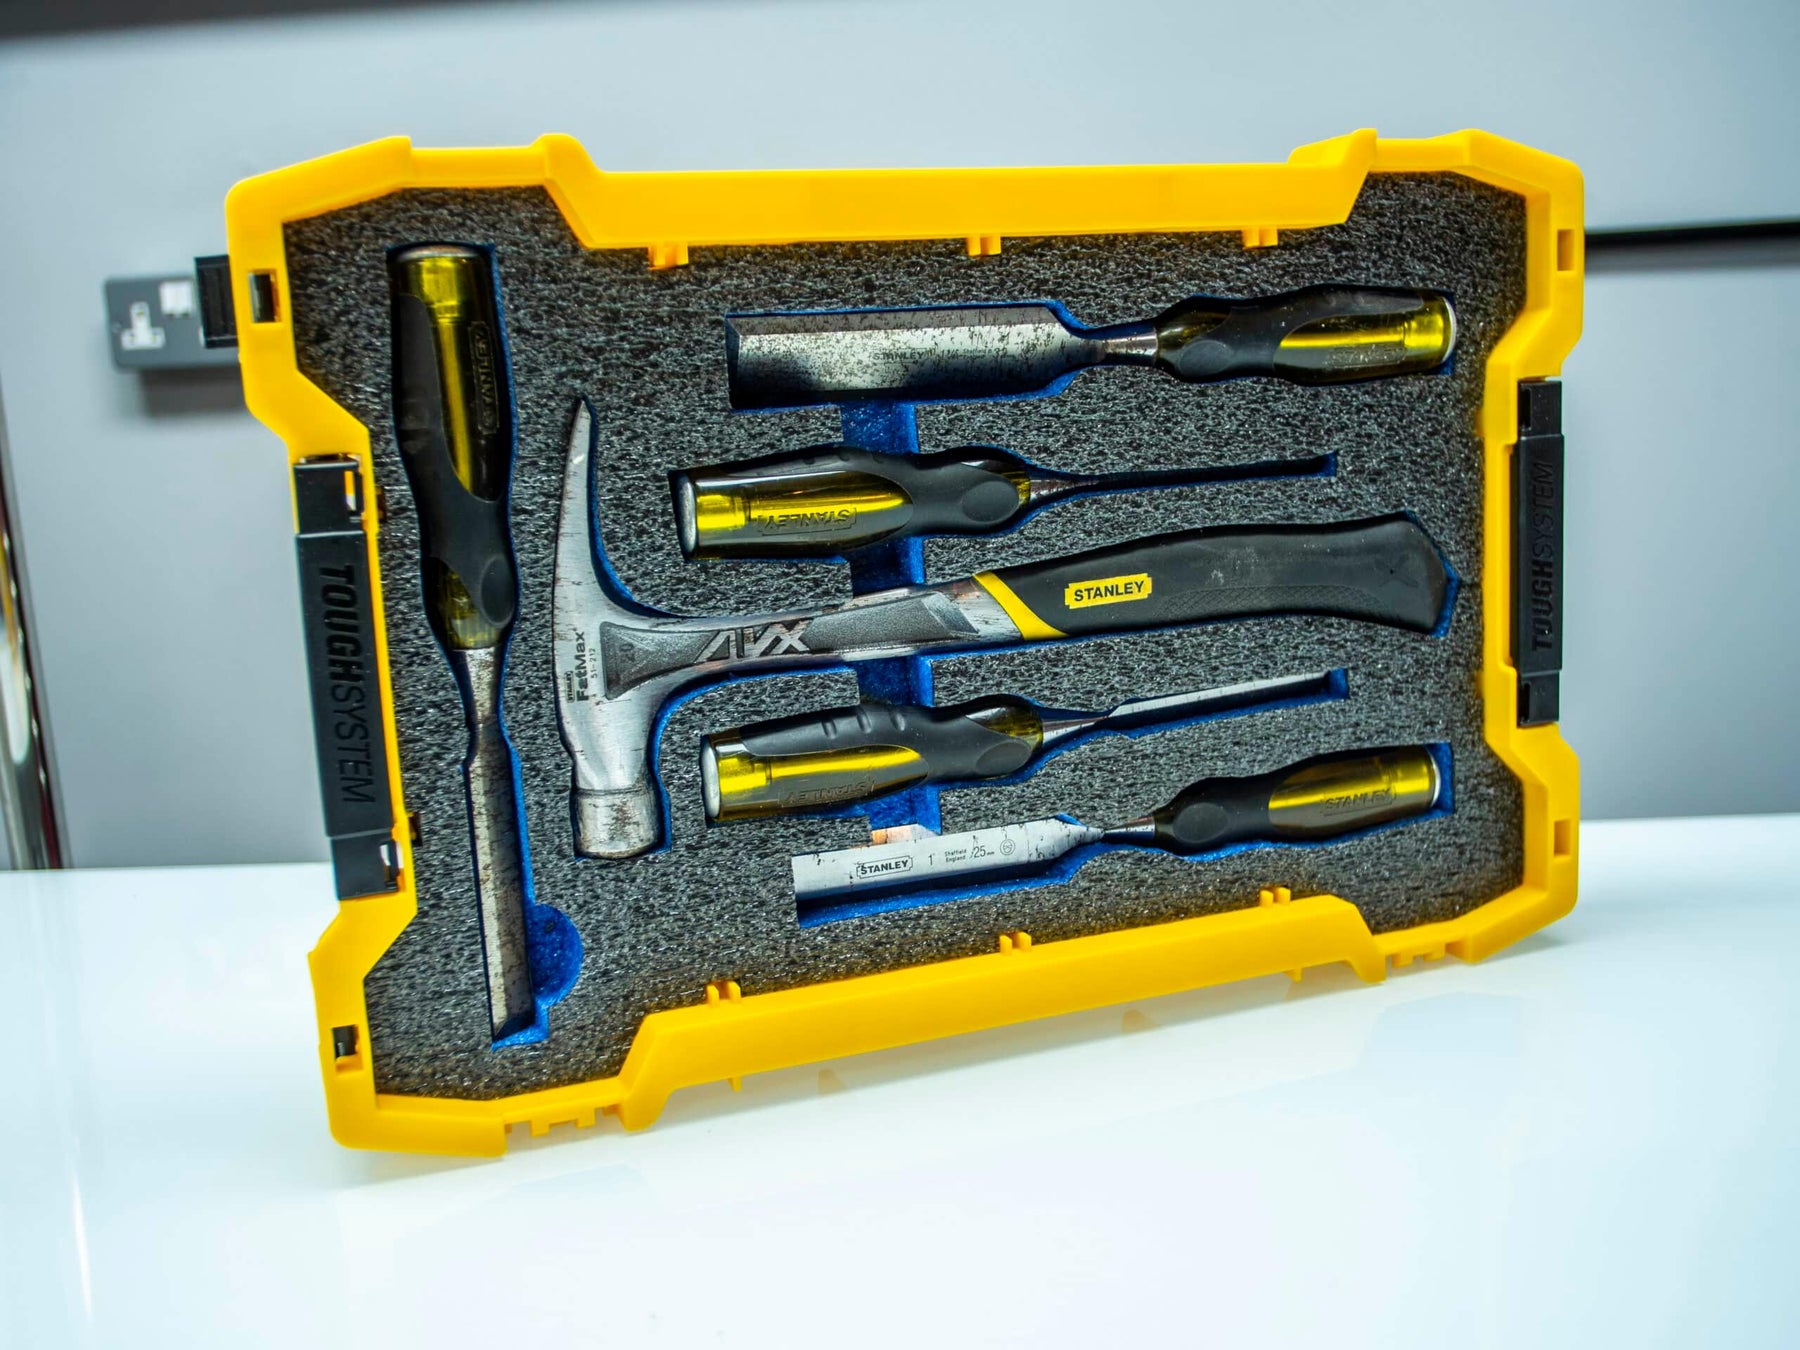
Ensuite, nous voulions stocker notre Stanley ensemble de ciseaux dans un plateau. Nous avons également ajouté un marteau à griffes. Encore une fois, nous avons fait cela en utilisant un insert en mousse de 30 mm, mais vous pouvez voir que lorsque nous l'ajoutons au plateau profond, cela laisse beaucoup de place. Dans laquelle, vous pouvez facilement ajouter une autre couche si nécessaire.

Troisième projet – plateau peu profond pour ensemble laser
Il y a un problème inhérent avec les boîtes profondes du système Tough. Dans l'ensemble, elles sont d'une qualité incroyable et ont une excellente fonctionnalité. Mais sans les plateaux et/ou les doublures en mousse pour protéger et organiser votre matériel, ce ne sont qu'un grand espace profond où vous pouvez soit gaspiller beaucoup de place, soit avoir de nombreux outils simplement entassés là-dedans, s'entrechoquant les uns contre les autres, ce qui n'est pas idéal et peut causer des dommages.
Nous ne voulons surtout pas que cela se produise avec quelque chose de coûteux comme un ensemble laser, alors ici nous avons organisé le nôtre dans une mousse de 50 mm Yellow pour le protéger lors de vos déplacements.

Quelque chose d'un peu différent – créer un insert en mousse extra profond
Nous voulions également stocker des piles et un chargeur dans les plateaux profonds et plus grands du Tough System 2.0. Nous avions donc besoin d'un peu plus de profondeur que l'insert de 50 mm seul ne nous aurait donné. Pour ce projet, nous avons donc repris les inserts en mousse Yellow. Mais cette fois, nous avons collé ensemble une couche de 30 mm et une de 50 mm. Cela nous a donc essentiellement donné un insert de 80 mm avec lequel travailler.
Pour le rangement du chargeur, c'était un peu plus simple car nous n'avions pas besoin de couper complètement à travers l'insert de 50 mm. Mais nous avons ajouté une petite section dissimulée pour cacher le câble d'alimentation inesthétique, et un support de prise astucieux pour le maintenir en place et éviter que les broches n'endommagent quoi que ce soit.

Cependant, les batteries étaient assez profondes. Donc, à cette fin, nous voulions couper à travers toute la profondeur de l'insert de 50 mm. Nous avons fait cela avant de coller les deux feuilles ensemble - mais n'oubliez pas de garder les morceaux que vous avez découpés, car en les remettant dans les trous avant d'utiliser de la colle en spray, vous annulez le besoin de masquer les zones découpées.
appliquant notre colle en spray aux deux morceaux de mousse et en laissant cela devenir collant, c'est la meilleure façon d'obtenir une bonne liaison solide. Le résultat était un insert profond parfait qui a créé le plateau amovible idéal pour le stockage et la charge des batteries.

Et maintenant, quelque chose de totalement différent….
Vous avez déjà vu certaines de nos idées de rangement « dissimulé ». Les gens ont adoré notre Tiroir à Whisky Caché il y a quelques années. Et ces plateaux se prêtent parfaitement à cela... ajoutant inserts en mousse en couches et en cachant tout ce qui vous plaît dans le fond du boîtier. Dans la vidéo de cette semaine nous avons fait exactement cela… en combinant les inserts DeWalt Tough System 2.0 avec nos inserts en mousse pour créer le stockage dissimulé ultime pour nos fournitures de biscuits et de bière. Alors, qu'en pensez-vous, et que stockerez-vous dans le vôtre ?


 Kit de découpe gratuit sur les commandes qualifiées
 Plus de 3 000 avis positifs
 Plus de 500 vidéos sur YouTube
 Soutien basé au Royaume-Uni