Clôture quotidienne des commandes à 14h
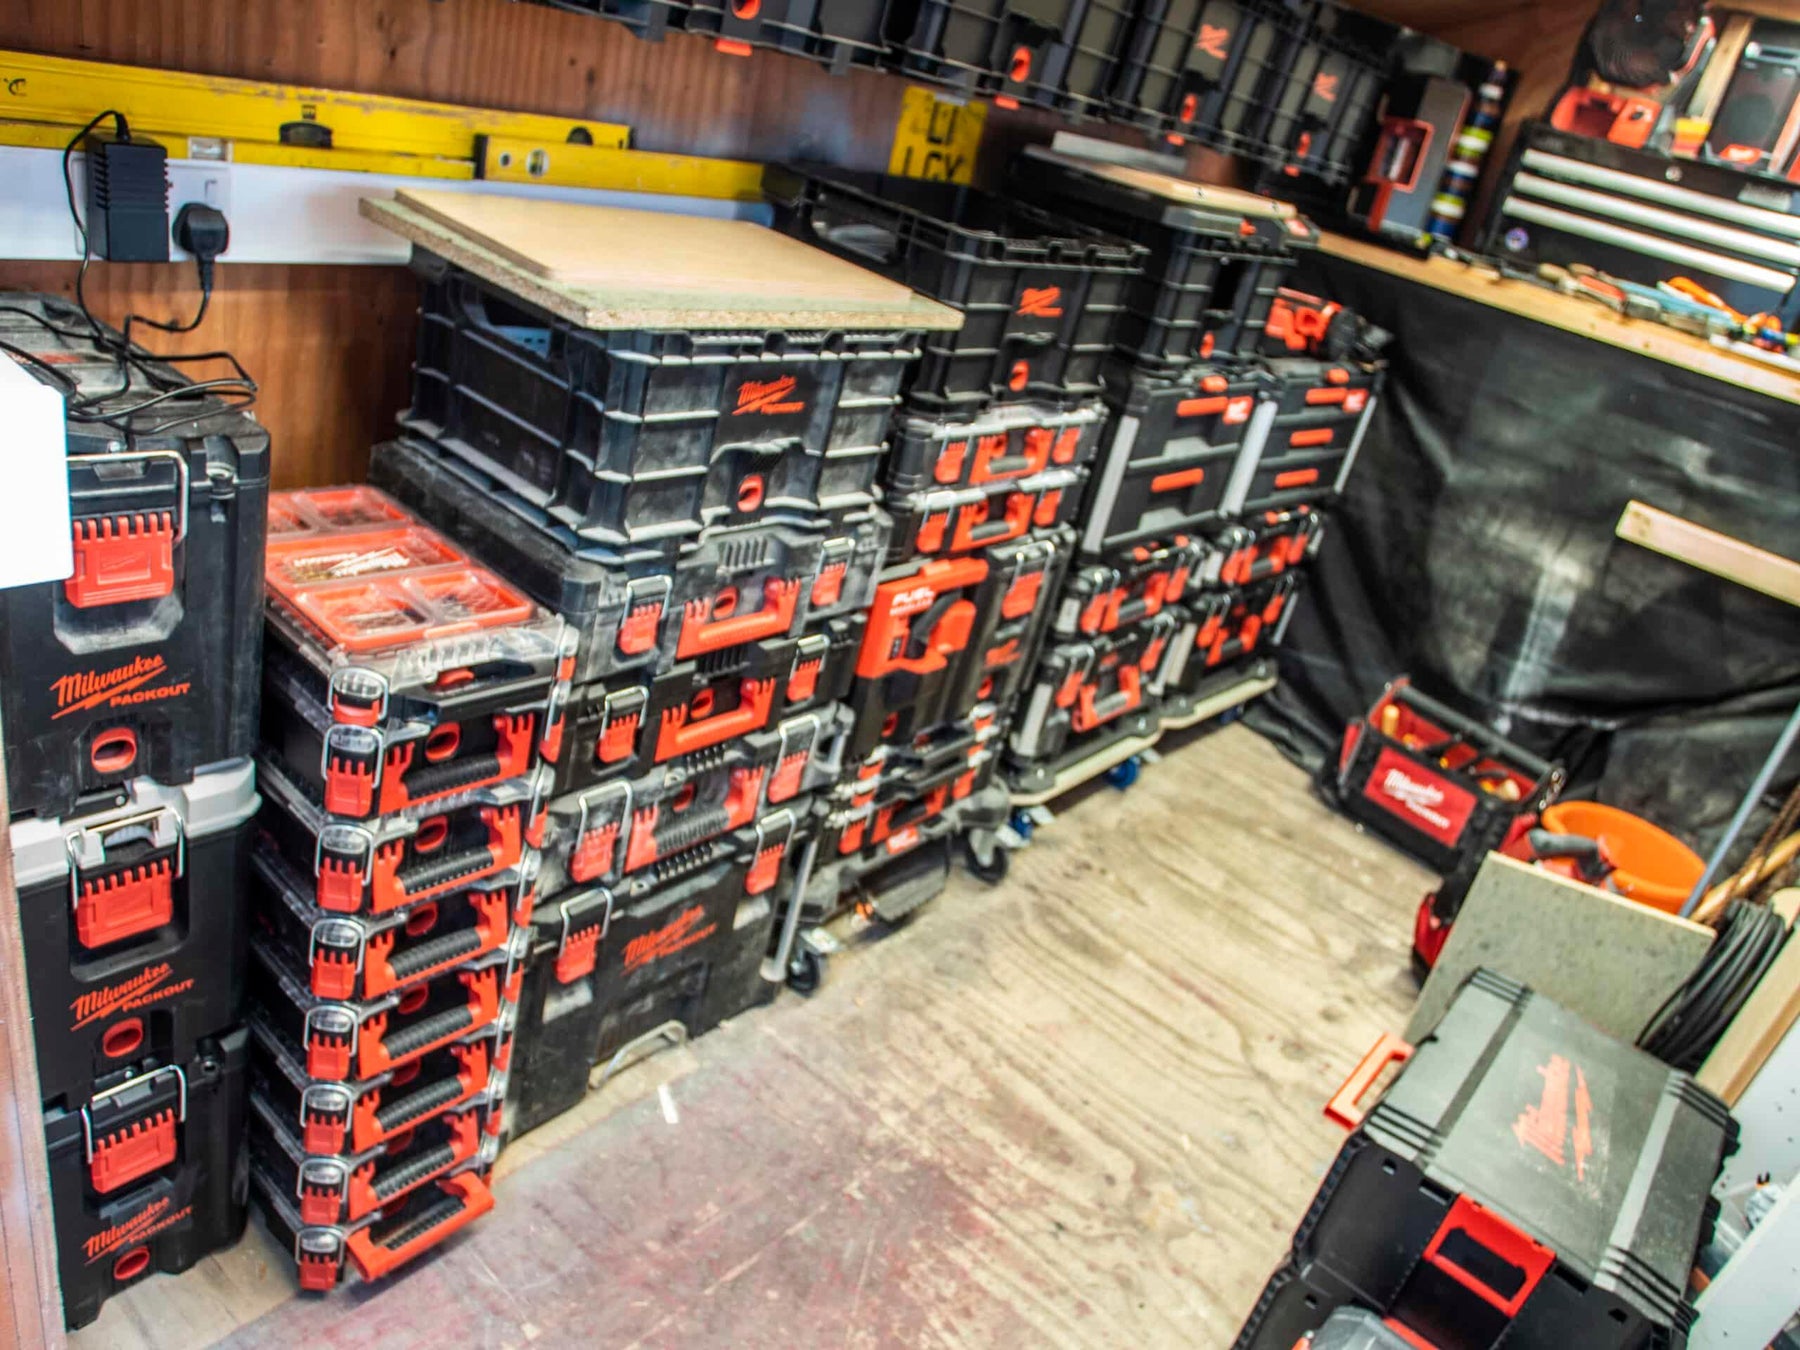
La collection ultime d'outils Milwaukee
L'équipe Shadow Foam a repris la route cette semaine. Nous avons passé quelques heures amusantes à rendre visite à un fan de Milwaukee et un bricoleur complet, Milwaukee Dave. Nous avions déjà prévu une vidéo sur le Milwaukee Packout car beaucoup d'entre vous nous l'avaient demandé. Et Dave est basé dans le Yorkshire et possède l'une des collections d'outils Milwaukee les plus enviables que nous ayons rencontrées. Il a eu la gentillesse de nous inviter à jeter un œil. Et bien sûr, nous n'avons pas pu résister à l'idée de faire un peu d'organisation d'outils pendant que nous y étions. tiroir Milwaukee Packout Tiroir Milwaukee packout Organisateur Milwaukee Packout

Qui sont les outils Milwaukee
Les outils Milwaukee sont une filiale de Techtronic Industries Co. Société à responsabilité limitée. (TTI). Fondée en 1985, TTI est un leader dans le marketing, la fabrication et la fourniture d'outils pour l'amélioration de l'habitat. Employant plus de 20 000 personnes dans le monde entier. Une entreprise américaine à l'origine, c'est le plus grand fournisseur en volume d'outils à main depuis 2016. Les outils Milwaukee sont largement considérés comme étant parmi les meilleurs du secteur. Ils sont connus pour leur qualité et leur durabilité, et ont une base de fans fidèle même ici au Royaume-Uni ainsi qu'à travers le monde, le Milwaukee Packout devenant un véritable favori de beaucoup.

La collection de Dave
Dave est électricien et menuisier. Ses outils sont en constante utilisation, et comme il est entrepreneur, il pourrait travailler n'importe où. Donc, la portabilité et la protection de son matériel sont importantes pour lui. Il nous a dit qu'il est maintenant célèbre parmi ses collègues pour ne laisser personne emprunter ses outils sur le chantier ! À l'origine utilisateur de DeWalt, cela fait quelques années maintenant qu'il a découvert que les caisses Milwaukee Packout lui offraient la flexibilité dont il avait besoin pour choisir ce qu'il voulait emporter pour un travail particulier, et comment il allait le transporter. À partir de là, tout son matériel DeWalt a été transféré à un collègue et ainsi la collection d'outils Milwaukee a commencé. Organisateur Milwaukee Packout

Maintenant, tout en travaillant, il a amassé une collection épique. Il a tout, des tasses de marque, ventilateur, haut-parleurs, radio, équipements de mesure… vous l'appelez, il l'a probablement. Et le meilleur dans tout ça… ? Tout est utilisé. Ce n'est pas une collection pour le plaisir de collectionner. Par exemple, il a vraiment tiré le meilleur parti de son ventilateur Milwaukee sur le chantier lors de la récente période de chaleur !

Vous pouvez voir pourquoi Dave était l'utilisateur parfait de Milwaukee avec qui nous devions travailler pour la réalisation de notre vidéo Milwaukee Packout ! Tiroir Milwaukee Packout
Qu'est-ce qu'il y a dans la collection
Dave venait de recevoir le nouveau SDS, alors il l'a installé dans son Milwaukee Packout en utilisant Shadow Foam déjà cette semaine-là. Mais cela mis à part, il avait des dizaines de Packouts ainsi que des Organisateurs Milwaukee et des Organisateurs Compacts qui utilisaient Shadow Foam pour organiser et protéger leur contenu. Une chose astucieuse que nous avons notée était que Dave gardait également et utilisait les plateaux en plastique robustes avec couvercle qui accompagnent les Packouts. Ainsi, ils pouvaient aussi être découpés dans la mousse et utilisés pour contenir tous les morceaux de SDS, etc. Idée astucieuse.
Une autre idée que nous avons apprise de lui concernait les ensembles de lasers. Le grand Milwaukee la boîte dans laquelle les lasers sont livrés n'est généralement pas des Packouts, donc ne fonctionnerait pas de manière modulaire avec tout le reste. Alors Dave les a pris, et en utilisant le Shadow Foam Inserts Milwaukee Packout, les a installés dans quelque chose qui fonctionnait mieux avec le reste de son système de stockage. Des articles plus petits comme les pistolets à chaleur et les fers à souder peuvent être rangés proprement dans le Organisateurs compacts Packout. Et un ajout récent à sa collection est le Milwaukee Tiroirs Packout. Dave a à la fois les versions à deux et trois tiroirs qu'il utilise pour ranger ses outils et batteries 12V.
L'une des choses les plus impressionnantes que nous avons trouvées était le organiseur compact stockant tout son kit de découpe Shadow Foam. Une vraie façon ordonnée de le ranger et de l'organiser, y compris les manches de scalpel, les lames, les marqueurs à long nez et autres. C'est du dévouement à la cause ! Tiroir Milwaukee packout Organisateur Milwaukee Packout

Organisation exceptionnelle du chariot Packout
Un des projets qui a le plus impressionné Jonathan était le trolley de Dave à Milwaukee. Il avait déjà transformé cela en un ensemble vraiment impressionnant.
Le chariot est à l'origine né parce que Dave avait besoin de quelque chose pour lorsqu'il travaillait dans les centres-villes ou dans des bureaux et devait transporter son matériel. Il contient beaucoup d'outils sans fil 12V - un outil multifonction, une scie à ruban, des batteries, des embouts de tournevis, des forets et bien d'autres choses.
L'une des choses ingénieuses qu'il avait faites était d'utiliser deux des inserts de 50 mm que nous fabriquons pour amener la base à niveau avec l'intérieur du boîtier. À partir de là, il pouvait ensuite couper ses outils à l'intérieur. C'était une grande leçon pour nous, quelque chose que nous n'avions jamais envisagé de faire auparavant. Le nivellement de cela signifiait alors que Dave pouvait ajouter un insert supplémentaire avec un panneau de fond en MDF à utiliser comme amovible étagère / couche. Réelle maximisation de ce qui pourrait autrement être un espace mort dans le conteneur. Organisateur Milwaukee Packout
Ce que nous avons fait pendant que nous étions là
Dave venait d'obtenir un Milwaukee Packout Drawers – l'unité à 2 tiroirs. Il voulait le préparer pour l'utiliser avec sa défonceuse M18. Pour l'accompagner, il avait également quelques profils de rayon, deux plaques de base différentes pour la base, et un gabarit de cercle. Il y avait aussi une boîte contenant tous les embouts de défonceuse et quelques clés à molette à y mettre. Pour un peu de plaisir supplémentaire, Jonathan et Dave ont pris chacun un insert de tiroir et ont partagé le matériel entre eux. Le jeu était lancé… le pro de la découpe de mousse contre l'expert Milwaukee !
Insert de Jonathan
Il a commencé par découper l'espace pour la baignoire car c'était l'élément le plus volumineux. En retirant le contenu, il pouvait le retourner et l'utiliser comme un guide parfait au millimètre pour découper autour. Comme toujours, lorsque découpe de Shadow Foam, nous traçons d'abord une coupe autour de l'article puis nous savons où il va. La baignoire peut ensuite être retirée et nous revenons pour couper complètement et créer le relief pour la baignoire.
Comme vous le savez, nous travaillons toujours avec notre scalpel Shadow Foam qui est livré avec notre kits de découpe pour travailler avec la mousse. Au moins quand Jonathan ne profite pas de son extra spécial Couteau à marquer Matt Estlea! Mais Dave avait un autre conseil pour nous ici… un marqueur de nez de 30 mm de long. Fréquemment utilisé par les menuisiers, dans ce cas, ceux-ci provenaient de Gros Pouce et se déclinent en plusieurs couleurs.
Cela pourrait s'avérer une autre méthode vraiment efficace pour éviter l'erreur de parallaxe. Il s'agit du déplacement apparent de la position d'un objet lorsqu'il est vu, ou dans ce cas découpé, sous différents angles. Il est particulièrement utile d'en être conscient lors de la découpe autour d'objets grands, ronds ou de forme irrégulière où les erreurs de parallaxe seraient plus courantes. Pour son insert, cependant, Jonathan est resté fidèle à sa méthode éprouvée d'utilisation du scalpel. En le tenant perpendiculaire à l'objet pour tracer le contour, cela a très bien fonctionné.
Les seuls articles sur cette insertion qui nécessitaient l'ajout de poignées pour faciliter leur extraction étaient les clés. Comme d'habitude, nous avons utilisé notre ensemble de pochoirs pour le faire proprement.
Insert de Dave
Jonathan était profondément impressionné par la coupe de Dave et pelage technique. Mais ensuite, il a eu beaucoup de pratique en faisant découper tous ses outils Milwaukee dans de la mousse ! Nous lui avons également présenté le nouveau spinners lissants qui sont idéales pour égaliser la base de vos coupes.
Dans le temps qu'il a fallu à Jonathan pour terminer son seul insert, Dave avait pratiquement terminé deux. Lorsqu'ils ont tous été placés dans les tiroirs Milwaukee Packout, ils avaient l'air exceptionnels. Vraiment professionnels. Regardez la vidéo complète ici et faites-nous savoir ce que vous en pensez !










 Kit de découpe gratuit sur les commandes qualifiées
 Plus de 3 000 avis positifs
 Plus de 500 vidéos sur YouTube
 Soutien basé au Royaume-Uni