order before 2pm
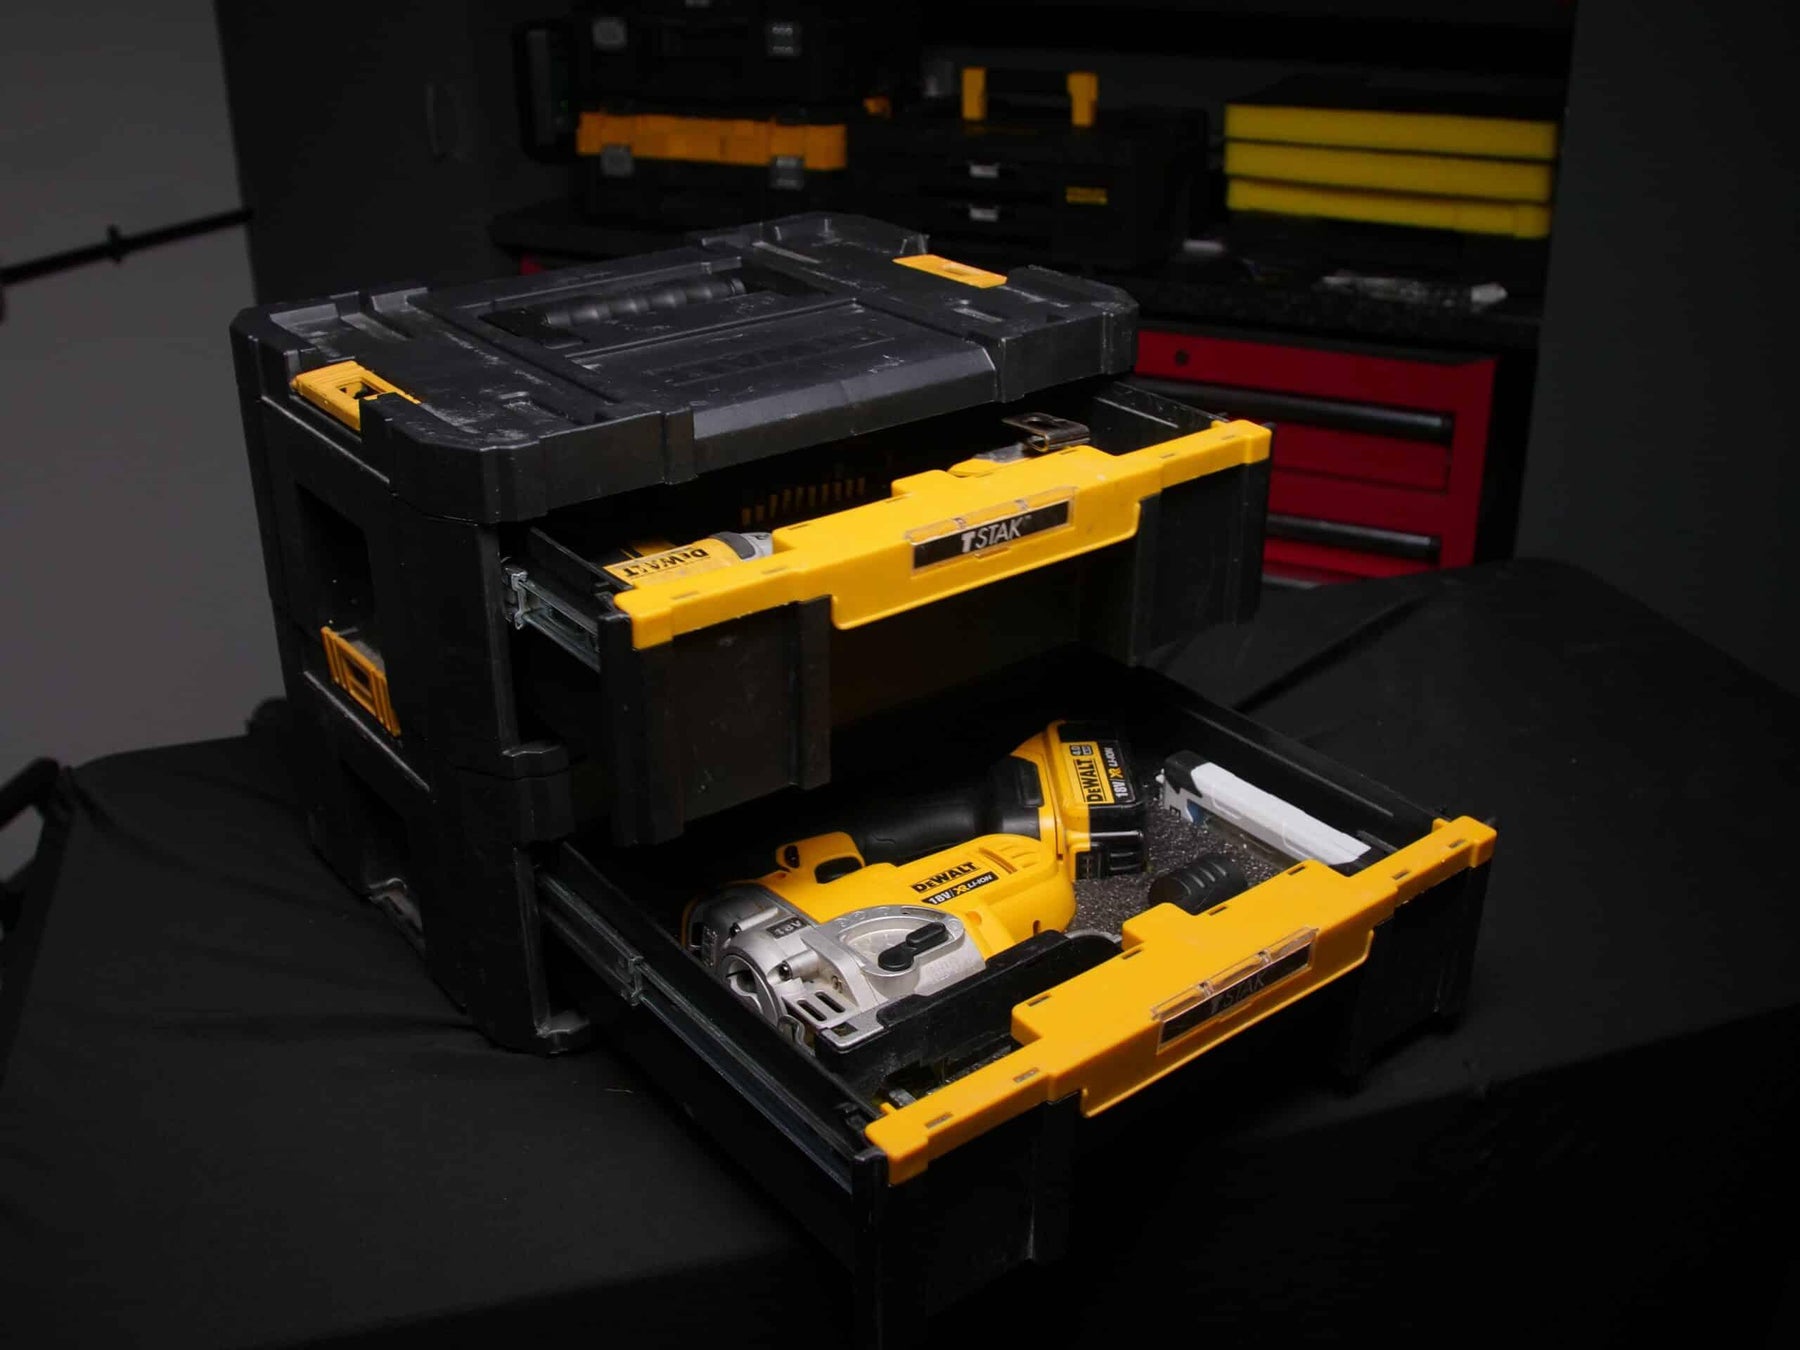
Wie man DeWalt TSTAK / Stanley Fatmax Pro-Stack Schubladen organisiert
Wir erhalten viele Fragen zu diesen Werkzeug-Systemen, also haben wir beschlossen, alle zu beantworten! Wir wollten zeige dir, wie um eine Reihe von Werkzeugen in den DeWalt TSTAK / Stanley Fatmax Pro-Stack Schubladen zu organisieren; sowohl die tiefen Schubladen als auch die flachen Schubladen. Wir haben bereits DeWalt TSTAK-Einsätze und Stanley organizer-Einsätze, unter vielen anderen, in unserem Geschäft. Dies macht es super einfach, die Einsätze zu machen, da Sie sie einfach anpassen und loslegen können. Aber wenn Sie keinen TSTAK- oder Stanley Fatmax-Organizer haben und einen Werkzeugkasten oder eine Schublade besitzen, für die wir keine maßgeschneiderten Einsätze liefern, schauen Sie sich dieses an einfache Anleitung. Mit unserer Hilfe können Sie gestalte dein eigenes Insert um pretty viel jeden Raum zu passen, den Sie möchten.

Das wissen Sie vielleicht schon, aber trotz der unterschiedlichen Markenauftritte ist die tatsächliche Form oder Vorlage jeder dieser Boxen genau gleich. Das liegt daran, dass beide Marken zu Black and Decker gehören. Das bedeutet, dass unser maßgeschneiderte Schaumstoffeinsätze wird all diese Schubladen schön und einfach passen.
Unsere Stanley Fatmax / DeWalt TSTAK Einsätze.
Unsere Einsätze beginnt bei nur 19,99 £ für ein Paket mit 2. Sie sind entweder in 30 mm oder 50 mm Tiefe erhältlich und in einer Vielzahl von Farben. Wenn man darüber nachdenkt, kann man für im Grunde einen Zehner ein Elektrowerkzeug schützen und organisieren, das möglicherweise etwa 10-15 Mal mehr kostet. Alles in allem ist es eine gut angelegte Kosten- und Zeitinvestition. Ihr Equipment über Jahre hinweg vor Verlust oder Beschädigung während des Transports zu schützen, ist so einfach!

Wem gehört der Stanley Fatmax Organizer überhaupt?
Der TSTAK, den wir organisieren werden, wird täglich von einem der Auftragnehmer genutzt, der an unserer neuen Einheit gearbeitet hat. Es gibt ein paar Schubladen, die sortiert werden müssen. Dann gibt es noch 3 weitere Schubladen im Pro-Stack, die für einen Dateningenieur erledigt werden müssen. Hier haben wir eine echte Mischung aus Werkzeugen, die untergebracht werden müssen, einschließlich spezieller Crimpwerkzeuge und Ethernet-Crimpwerkzeuge.
In der Stanley Fatmax Pro-Stack-Tiefschublade befinden sich flache Rippen im Boden der Schublade, auf denen unsere vorgefertigten Einsätze einfach gut aufliegen können. In den kleineren Schubladen sind abnehmbare Rippen eingebaut, die dort Abschnitte schaffen, und diese können einfach herausgewackelt werden, damit der Schaumeinsatz gut hineinpasst.
Die Planung des Layouts Ihrer Schubladen
Wenn es darum geht, das Layout für Ihre Werkzeuge zu planen, ist es wichtig zu berücksichtigen, was Sie als Hauptbenutzer wo haben möchten. Da wir dies für jemanden tun, haben wir uns von ihnen leiten lassen, wo sie die Hauptgegenstände bevorzugen würden, und dann ein wenig angepasst, um mehr Ausrüstung für sie unterzubringen. Ein weiterer Aspekt ist, dass wir beim Ausstatten von Schubladen sicherstellen müssen, dass die enthaltenen Werkzeuge nicht zu hoch stehen, damit die Schubladen noch geschlossen werden können. Schubladen sind in dieser Hinsicht viel weniger nachsichtig im Vergleich zu Werkzeugkästen!
Sobald wir mit dem Layout zufrieden waren, entschieden wir uns, mit der Stichsäge zu schneiden. Sie hat bereits einen Akku und ein Blatt angebracht... wir wollten dies zu einer dynamischen Aufbewahrungslösung machen. Die Idee ist, dass man einfach das Werkzeug, das man möchte, herausnehmen kann, ohne Batterien, Klingen usw. für die Aufbewahrung entfernen zu müssen.
Wichtiger Sicherheitshinweis!
Bitte stellen Sie immer sicher, dass Sie Schneidhandschuhe tragen, bevor Sie mit dem Schneiden beginnen. Wir werden dieses Projekt mit den Klingen schneiden, die in unserem enthalten sind basic cutting pack. Diese Pakete sind bei allen Bestellungen über 50 £ kostenlos. Aber wenn Sie noch keine Schneidhandschuhe besitzen, lohnt es sich, diese zu bekommen. Wir liefern sie als Teil unseres nächsten Levels Schneidekits; Sie können diese zu Ihrem Warenkorb zum halben Preis hinzufügen. Das sind weniger als 10 £, wenn Sie eine Bestellung für Schaum aufgeben. In den Schneidpaketen sind auch Anleitungen enthalten. Außerdem ist es ratsam, sich mit einigen unserer YouTube videos, insbesondere rund um das Schneiden und Schälen, bevor man beginnt.
Zeit, unsere DeWalt TSTAK-Einsätze zuzuschneiden
Für cutting, wir üben nur einen kleinen Druck auf den Artikel aus, dann halten wir das Skalpell wie einen Bleistift und verwenden es, um eine Linie um den Artikel zu ziehen. Zunächst überspringen wir die Klinge und konzentrieren uns darauf, die Kontur des Artikels selbst zu ritzen. Sobald wir leicht herumgegangen sind, können wir dann zurückgehen und bis zur gewünschten Tiefe für das Werkzeug schneiden. Offensichtlich wollen wir nicht ganz durchschneiden, aber trotzdem so tief wie möglich gehen. Für uns hier, die 50 mm Einsätze verwenden, bedeutet das, bis zu einer Tiefe von etwa 40 mm zu gehen und 10 mm als starke, solide Basis zu lassen. Manchmal müssen wir bei tieferen Artikeln tatsächlich ganz durchschneiden, wie Sie später sehen werden. Aber wo immer möglich, lassen wir eine Basisschicht. Dann ist es Zeit zu peel.
Wie immer testen wir die Passform des fertiggestellten Einsatzelements und stellen sicher, dass wir die Schublade schließen können! Dann können wir mit dem nächsten fortfahren.

Als nächstes die Bohrer. Hier haben wir es geschafft, einen Kombibohrer und einen Schlagschrauber zusammen mit Schlagbits, Schraubenausziehern und einigen anderen Kleinigkeiten unterzubringen. Wir haben in einem Abschnitt komplett durchgeschnitten. Wie die Abbildung unten zeigt, ist dort der Gürtelclip des Auftragnehmers am Bohrer befestigt. Offensichtlich wollen wir das für die Benutzerfreundlichkeit erhalten. Aber das Schaffen dieses kleinen Bereichs mit zusätzlicher Tiefe sorgt dafür, dass es schön und eng sitzt. Außerdem stellt es sicher, dass es beim Öffnen und Schließen der Schublade nicht hängen bleibt. Wir fügen auch Fingerzüge hinzu. Das ist ein großartiger Tipp, um sicherzustellen, dass es schön und einfach ist, die Werkzeuge leicht aus dem Schaumstoff zu holen.

Der Stanley Fatmax Pro-Organizer
Damit sind die TSTAK-Schubladen fertig... Zeit, mit den Stanley Fatmax Pro-Stack-Schubladen fortzufahren, indem Sie denselben Prozess anwenden. Zuerst das Layout planen, den Schnitt umreißen, auf die erforderliche Tiefe schneiden und dann den Schaum abziehen. Der Hauptunterschied zu den vorherigen Schubladen besteht darin, dass wir etwas mehr Gewicht auf den Gegenstand anwenden müssen. Dies verhindert, dass sich kleinere/leichtere Gegenstände auch nur geringfügig bewegen, wenn man herumschneidet. Bei feineren Gegenständen ist es noch wichtiger, die Klinge beim Schneiden senkrecht zum Schaum zu halten. Dies stellt sicher, dass keine Gefahr besteht, die Klinge unter abgerundete Werkzeugprofile zu kippen.
Ästhetisch haben wir es so geplant, dass alle Griffe in die gleiche Richtung zeigen. Das ist nicht nur angenehm für das Auge, sondern erleichtert auch das Ziehen mit den Fingern. Wir können einen langen, ordentlichen Fingergriff über sie hinweg mit einem Stahlmaßstab machen. Außerdem haben wir die volle Tiefe der Werkzeuge in den Schaum geschnitten, sodass sie perfekt bündig darin liegen. Das bedeutet, dass wir wissen, dass die Schubladen so funktionieren, wie sie sollten.


