order before 2pm
Building the perfect CNC laser set up
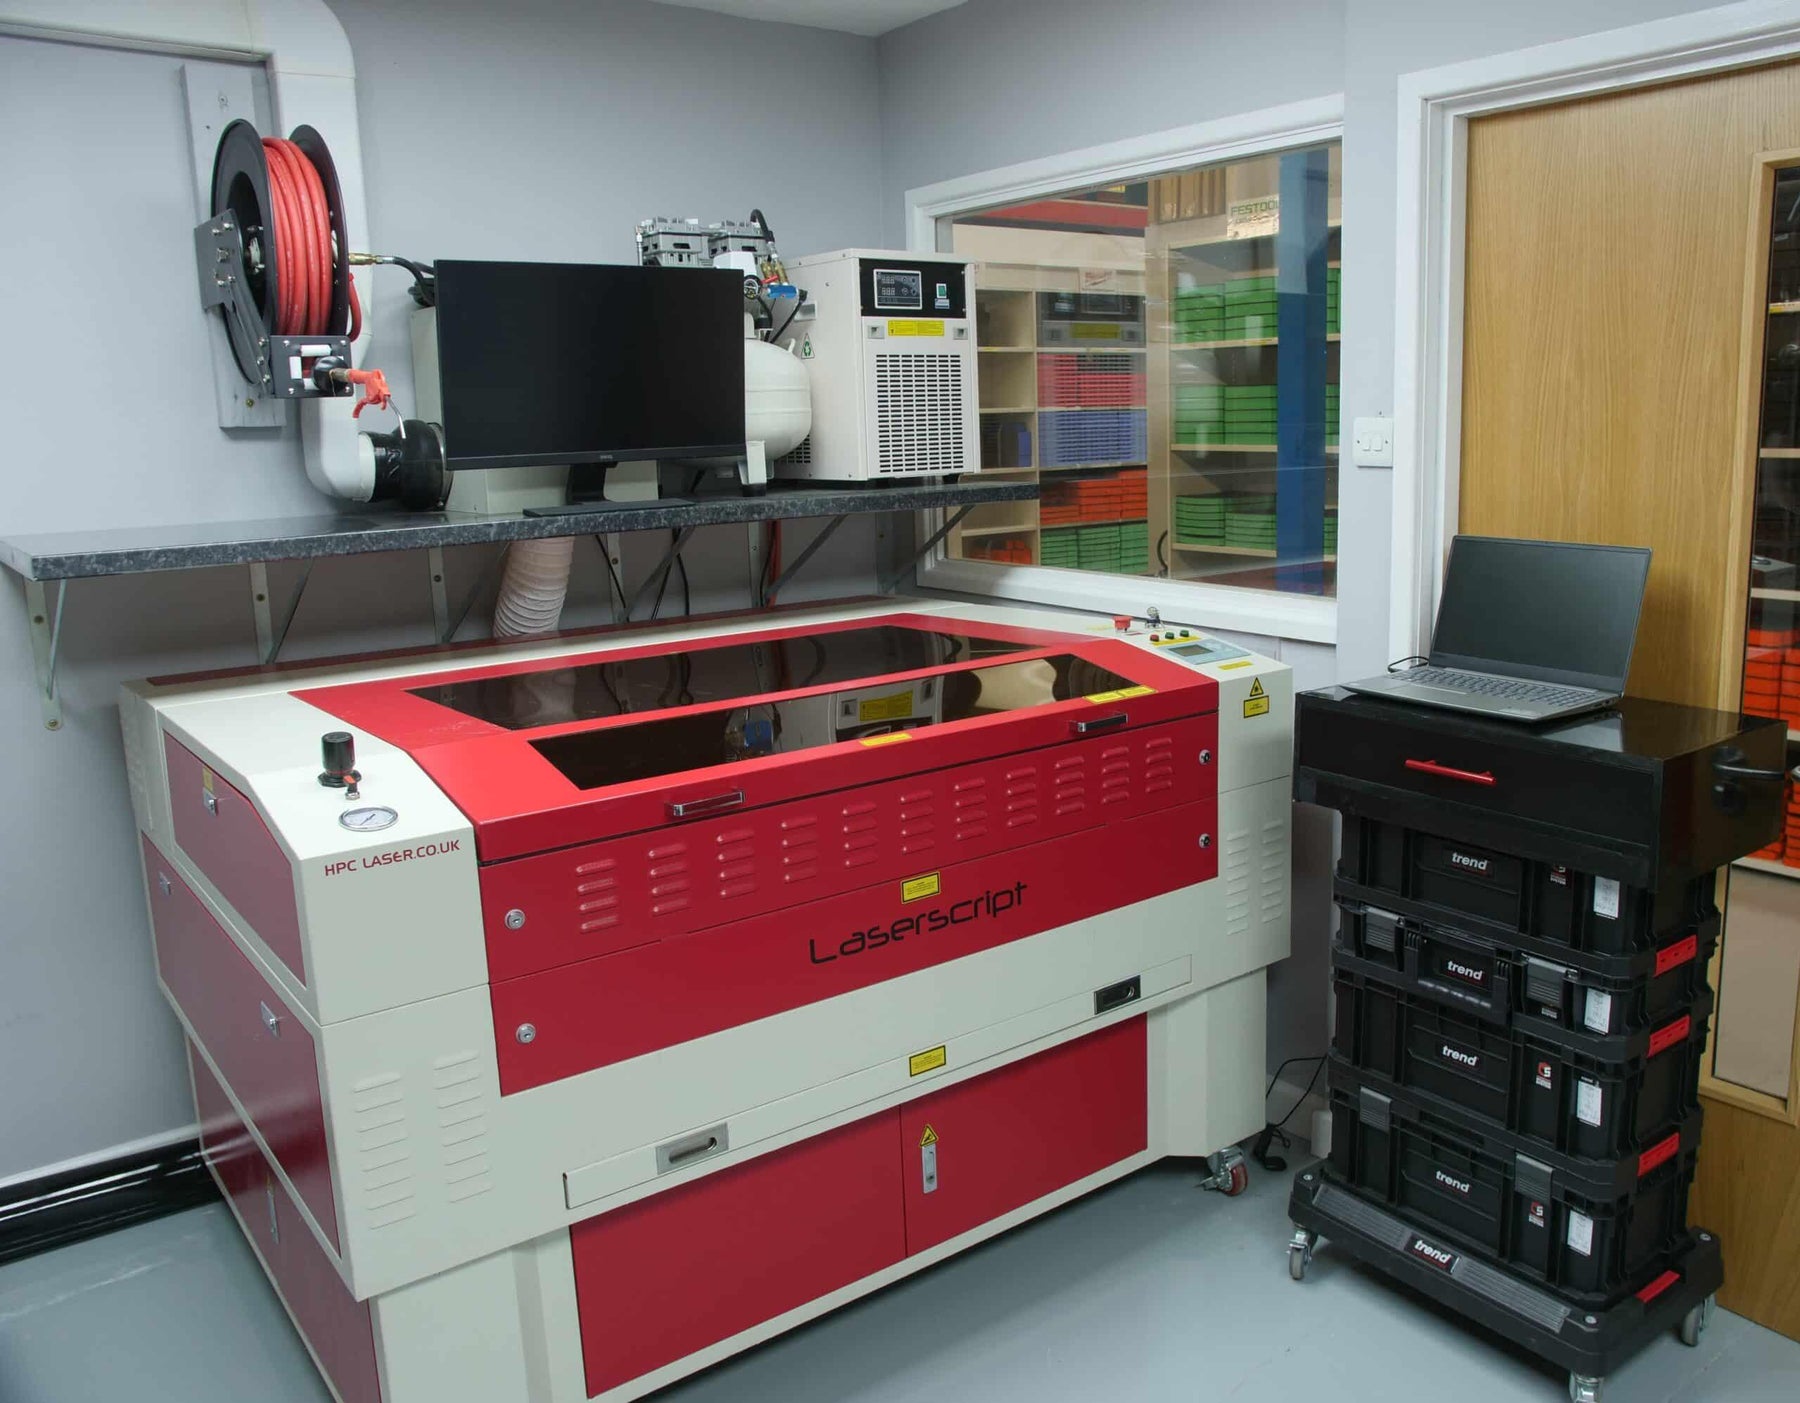
We’re transforming our workshop and studio. As you’d expect, we want to organise every inch and corner in the process. Now it’s the turn of our massive CNC Laser Cutter. Creating a new shelf and equipment layout which will make it both easier and safer to use. We’re also taking the opportunity to create a rolling work surface out of a Trend Tower Toolbox. This can then also be used to house all the additional accessories that come with the CNC laser cutter. laser cut foam cnc laser cutter cut foam to size

Why we’re doing this
Well you know that not too long ago we moved units. So we needed to have our laser CNC serviced which we had done by the awesome team from HPC. We’ve had this machine for about two years now, and it was with us at our old unit. We’ve moved it across but then it was out of commission for a while. We did run it temporarily with some temporary ducting and running it from a laptop. That was okay as a temporary fix, but not long term. So now it needs clearing up, housing properly for use and organising. So the main priorities for today are to get the water chiller, compressor and extractor up on a shelf.
A bigger challenge is going to be organising all of the little parts that go with the laser. So this laser comes with a few small bits and bobs that you really need to keep safe. We’ve also added an additional lens. These are really expensive and quite small and easy to lose if you’re not careful. Also we’ve got the 41mm spacers that we need for the lens. Plus lots of little tools that you need to be able to remove it. Keys for the front and side panels, all sorts of important bits for its functioning. So of course, we want to be able to keep all of this safe.
The heavy duty shelf
As we’re all about reusing and recycling at Shadow Foam, this is a floating shelf that we picked up from B and Q about two years ago. We did use this in the old workshop too, but since moving it’s just been hanging around. So we’re going to re-purpose it as the top surface of a little rolling cart. This can sit near the machine and used for operating the laser. So then we can have a keyboard and mouse on it, and also just can roll it out of the way if we need to move the machine. laser cut foam cnc laser cutter cut foam to siz
To begin with we mounted three shelf brackets that were super sturdy. We wanted 4 of these in total to hold the weight of the three large pieces of laser equipment. The first 3 brackets were anchored to joists for strength but there wasn’t a joist for the fourth. So for this we used a wall anchor kit. This can be used for metal work or a variety of things. But it’s ideal for this purpose too.
Using a wall anchor kit.
It’s quite simple, we used some of the bigger anchors for this. We marked up the wall, drilled a guide and hammered the anchor fixings in. Then the little spikes on the back act as a kind of claw to hold it in the wall. There are two halves to the anchor guns, a front silver part and then an inner part that pulls back when you pull the trigger. So you want the whole of that around the screw head. Once it’s around you then just pull tightly until it won’t pull anymore and then you can let go and that’s that fixing in place.
We wouldn’t really trust any substantial weight on these anchors alone though. For us as we’ve already 3 brackets strongly anchored in joists in the wall, this is just evening up the spacing between the brackets. laser cut foam cnc laser cutter cut foam to siz

Next we cut some work surface down to size, then edge it to make it look neat. We’ve done edging before but the glue we used for this was going to take about 2 hours to go off which was a bit frustrating, but lots to get on with in the meantime.
Positioning the extractor, compressor and chiller
Jonathan jigsawed a hole in the centre of the shelf to allow the extractor hose to go neatly through. Then got all three big units positioned onto the shelving with power. Then he could touch up the walls from where the previous temporary ducting had been removed, and where the compressed air line was re-positioned. From there it was all about getting all the kit properly plumbed in in their new permanent positions. But doing this has helped us get the whole laser unit about 100mm closer to the wall. So it’s freed up a lot of valuable, workable space for us. We can still clearly see the screen, the temperature and the pressure gauges. In fact that’s easier than before as it’s all now positioned at eye level.

All the bits of equipment that previously would crack us on the shoulder when we least expected it were now in a much safer position. The laser itself can now be moved out for access and maintenance and be back against the wall when we need the space. Perfect. laser cut foam cnc laser cutter cut foam to siz
The computer
The last thing we needed to do is sort out the computer situation. We are trying to create the ultimate laser setup here. Taking into consideration that we’ve just lifted all that gear up so we can move it around easily, we don’t now want to block it in with a fixed keyboard shelf. So again, we need something on wheels. And that led us to a set of Trend boxes we had.
We originally brought these in because we wanted to map them out to make inserts for them. We’ve now done that and they’re selling like hotcakes through our store. Again though, we are all about upcycling and repurposing here. So with the added bonus of these cases matching our branding and our colours, we’re going to adapt it for this new purpose. It’s actually also the perfect depth and width for a keyboard and fits where we want it to go. So all we need to do is make it a bit taller so it’s the right height to use the computer comfortably.

How the top of the unit was made.
The next job is to make a top for this Trend stack. Then we can actually mount this drawer. We need to make a little frame to hold up the re-purposed shelf we mentioned as this will then become a great little work top for a keyboard and a mouse. Plus the drawer which we can put some Shadow Foam in and organise all the little bits that we need to keep with the machine. cut foam to size
Jonathan took to the tools to make the box top and housing for the former floating shelf and drawer. We ended up with screws on the outside but nothing on the top. Here then we just used filler to fill up the screw heads then let it dry off ready for a sand and a paint while we get on with organising the drawer.
Getting organised!
One of the great things about organising with Shadow Foam is that it draws your attention to things that you don’t need. Helps you sort out what is really important versus things that are essentially redundant. So that’s the first job, sifting out whatever isn’t necessary in the kit.
In terms of what’s going in. We’ve found that having some scissors handy is pretty useful. Also we have a spanner in there as there’s few little nuts and bolts in there that you sometimes have to adjust or tighten up. Tweezers are handy to help get the lens in and out. The allen keys came with the machine so we’re going to keep them with our kit. There’s a spare fuse and a couple of memory sticks which are important as you have to load the drawings onto the laptop and we usually use those to do it. There’s also a USB Key for the software, so you have to have that to operate it. A tape measure is also really useful, as is a lens cap.
Creating the custom foam liner.
To organise all this in the foam, we have cut foam to size in 30mm red to fit straight into the drawer. We offer this custom size foam as a service, or you can cut foam to size yourself to fit any container, and we’ve created a simple guide to help you do that.

We’ve created a specific guide to Shadowfoaming which could be useful to you from here on in. But the key things we have done for this job pretty much follow that usual process. As long as you have the right cutting equipment which you can find in our Extras store, you’ll be good to go.
As we always say, plan plan plan. Figure out what you want to go where. When you’re happy with the layout of all the items you want in the drawer, take a photo. This is an invaluable prompt as you go on to help you refer back.
Then all that’s left is to cut and peel to get the items into the foam. For doing this at home check out Jonathan’s demonstration on this video, and our How to Cut and How to Peel guides are also super useful. This part only took us about 15 minutes. But remember we do this all the time, so allow yourself a little longer. However, you’ll be surprised how quick and easy it is to get a drawer like this organised impeccably.
Putting the finished unit together
The work we did on the top unit dried nicely in the time it took us to cut the tools into the foam, so it was time to sand and finish the unit. For the most part a couple of coats of black spray paint was sufficient. But as we also wanted to create a really nice finish, we also used vinyl wrap on it. You might have seen us do similar in our Makita Power Tool Wall project last year too. It really does give a great result and high gloss finish.
Once we’ve attached a handle to the drawer (one of a pack of 5 from Amazon that cost £7, the rest we can use elsewhere) that’s the whole Trend stack converted to become a wheeled, mobile work station for our CNC laser machine. cut foam to size
This has been quite a quick project for us but has resulted in what’s basically a huge upgrade making our laser much easier to access and use. So, what do you think?

If you’re thinking of using your own CNC laser cutter to cut foam, remember this isn’t our recommended method of cutting as we designed the product to be hand cut. But for those who do still want to give it a go, maybe a sample would be useful to trial? These sample packs are available for just £5 and you even get a voucher for £5 off your first order, so what have you got to lose?

