Cierre de pedidos diario a las 2 p.m.

Cómo lograr la perfección en el cajón de herramientas
Si como nosotros tienes un banco de herramientas Clarke u otro tipo de banco de herramientas con cajones, esto es para ti. Esta guía te ayudará a tener un cajón de herramientas perfectamente organizado en un abrir y cerrar de ojos. A su vez, esto durará y protegerá tus herramientas durante muchos años. Nunca más perderás o extraviarás una herramienta al llevar el control de herramientas de nivel aeronáutico a tu propio hogar o taller. Ahorra tiempo y dinero... ¿qué no hay que amar? ¡Y aquí te mostramos cómo se hace!
Nuestro baúl de herramientas Clarke
Este enorme banco de herramientas ocupa un lugar destacado en nuestro taller-estudio. Nuestros herramientas se utilizan con frecuencia para los muchos proyectos en los que trabajamos, por lo que tenerlas bien organizadas es importante.
Tendrás nos han visto organizando nuestros cajones de herramientas Clarke antes. Anteriormente, todo el baúl de herramientas estaba organizado usando nuestro viejo, ahora discontinued grado de espuma, Shadow Foam Original. Shadow Foam Original era genial, pero no era realmente sostenible como producto, por lo que se está reemplazando. Además, era mucho más suave que la nueva espuma. Significativamente, no era tan duradero ni fácil de limpiar y el Colour superior podía ensuciarse después de mucho uso.
Así que todo está listo para la actualización, ¡y eso, por supuesto, es un gran trabajo en un banco de herramientas de este tamaño! Recientemente hemos completado los cajones de llaves, así que hoy pasamos a nuestro kit eléctrico aislado.

¿Qué va en el cajón?
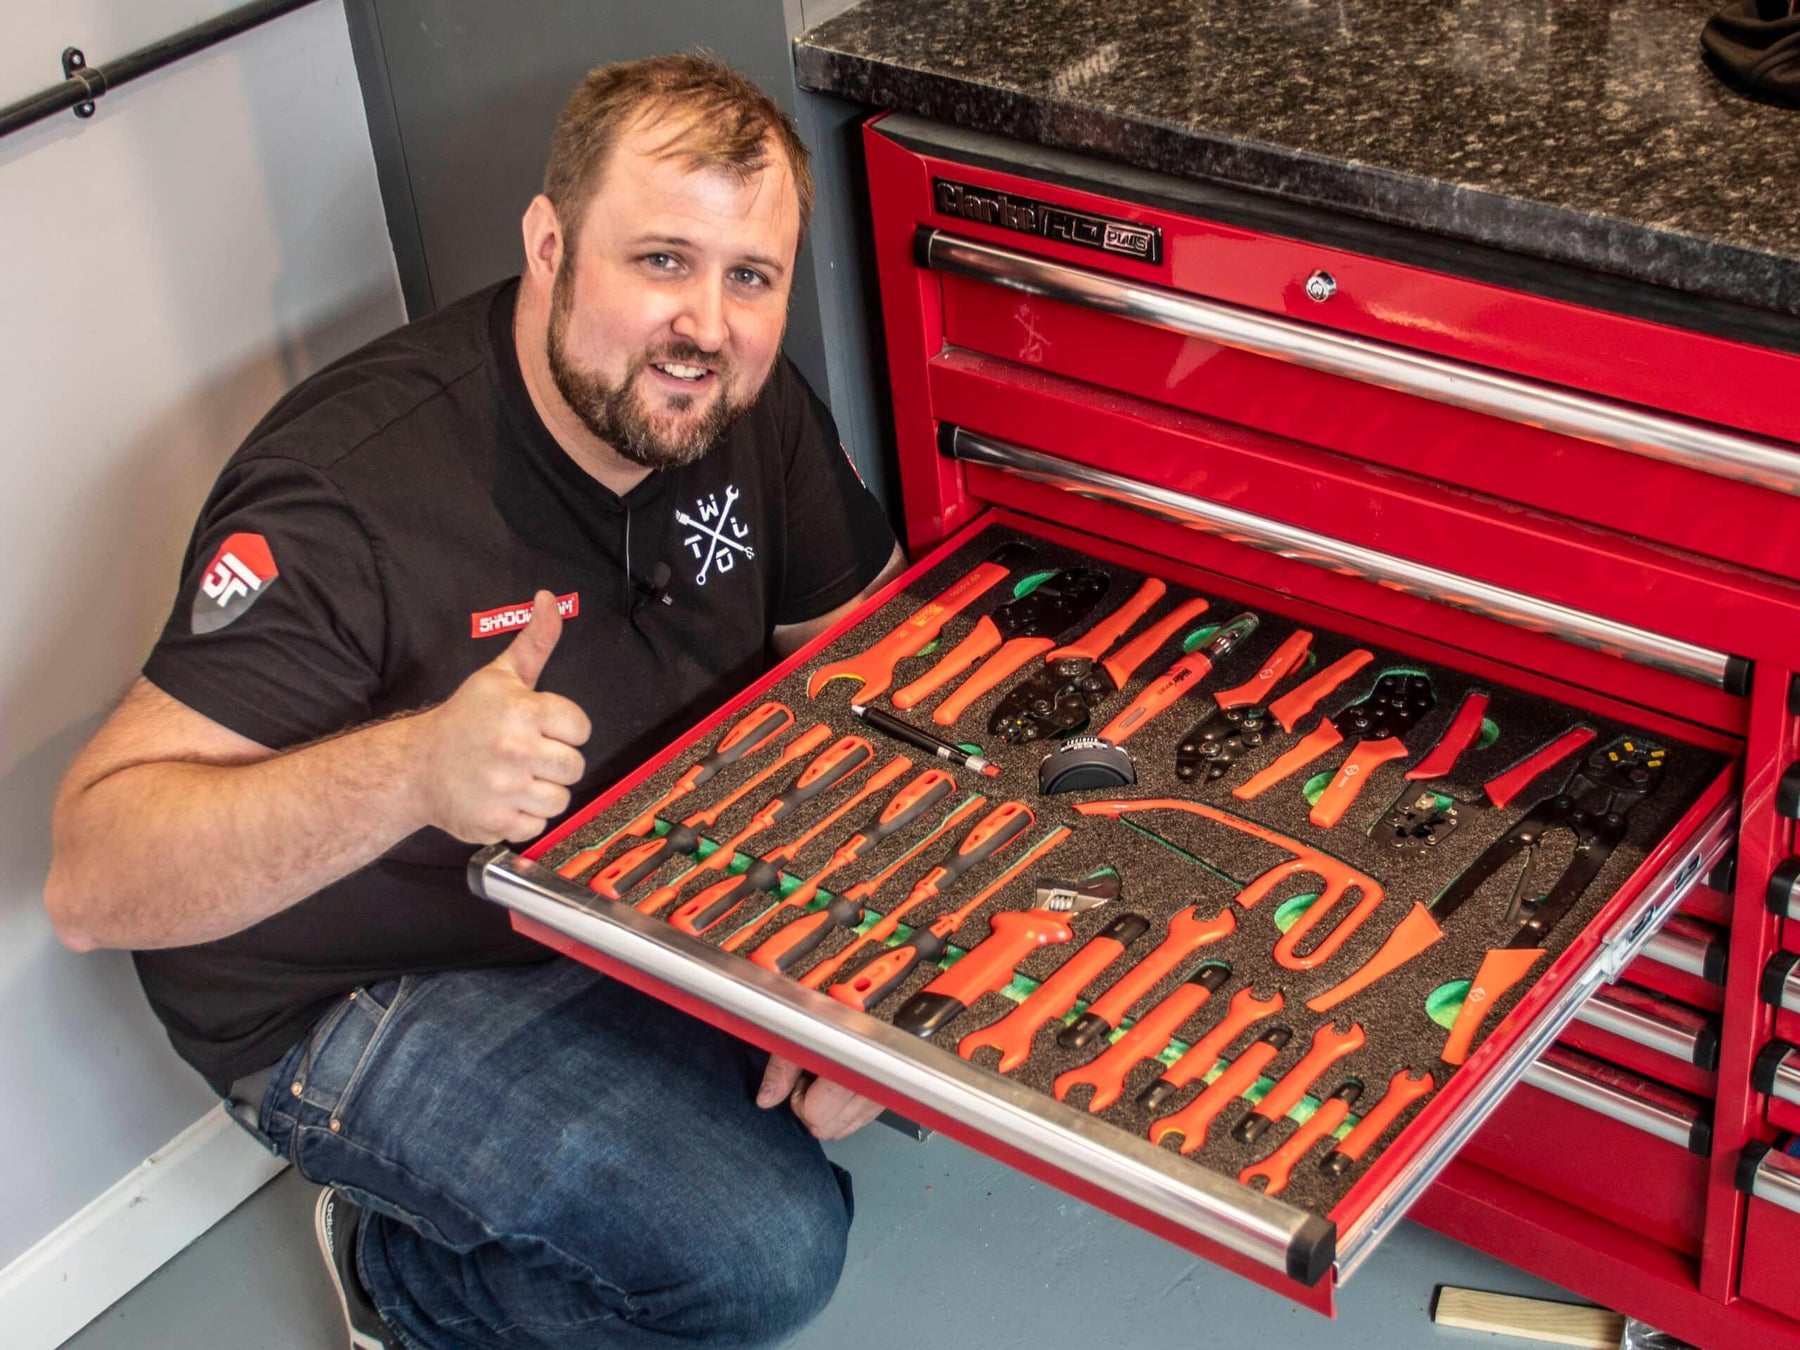
Hemos acumulado una colección bastante grande de Herramientas de engaste CK y una sierra de hackeo aislada. También un soldador a gas y un succionador de soldadura junto con un soporte, algunos puntas intercambiables y un tubo de soldadura y una llave pequeña. Además, tenemos un juego completo de Llaves de vaso aisladas Bacho, y our GearWrench destornilladores de tuerca aislados.
Eso es un montón de equipo para encajar en un solo cajón. Pero utilizando el consejo principal de Jonathan de posicionar tus herramientas de punta a cola, puedes ahorrarte aproximadamente un 30% más de espacio en comparación con simplemente alinearlas uniformemente una al lado de la otra.

Cómo se hace
Siempre recordamos a las personas lo mismo. Por favor, siempre use guantes anticorte cuando trabaje con Shadow Foam y las cuchillas afiladas que necesita para cortarlo. Si no tiene ninguno, los suministramos en nuestro kits de corte, y realmente son importantes.
Nuestra herramienta recomendada para cortar la espuma es un escalpelo. Nuevamente, estos están disponibles en nuestros kits de corte si no tienes uno ya. Y siempre sugerimos refrescar tu conocimiento sobre las mejores técnicas para cortar y pelar a través de las guías en el Cómo hacer sección de nuestro sitio web. También tenemos un útil Guía para Shadowfoaming. Esto tiene algunos de los mejores consejos y sugerencias y las preguntas más frecuentes que encontramos.
Una cosa que hicimos ligeramente diferente aquí es un truco ingenioso para saber cuándo el espacio es limitado. Creamos un espacio oculto para que los artículos del soldador a gas se coloquen. Así que lo que hicimos aquí fue cortar alrededor del soldador a gas para que se ajuste bien en el espacio, luego lo retiramos. Ahora, debajo de él, vamos a cortar los artículos adicionales. El tubo de soldadura y la llave pequeña. Ahora pueden estar ocultos de manera ordenada debajo del propio soldador.
Los detalles de acabado
Con este proyecto, una vez que habíamos cortado todas las herramientas en la espuma, también queríamos agregar tiradores para facilitar su extracción. Las dos técnicas principales que utilizamos para hacer esto son con un borde recto. Para esto usamos nuestro Shadow Foam borde recto. O un círculo, y para esto usamos nuestro Juego de plantillas de Shadow Foam. Con este proyecto realmente nos ha gustado el contraste entre la Green espuma y las Red herramientas. Pero echa un vistazo, ¿qué piensas?


 Kit de corte gratuito en pedidos válidos
 Más de 3.000 críticas positivas
 Más de 500 vídeos en YouTube
 Asistencia en el Reino Unido